小程序结合后端实现增删改查历史数据
下载 tabbar 图标并设置 tabbar
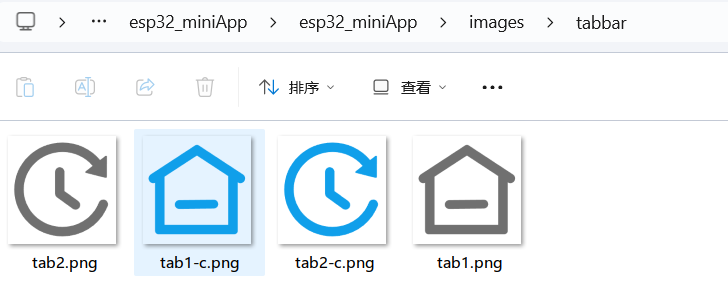
下载图标阿里巴巴矢量图标库


命名方式和路径如下图所示
app.json 的 pages 里加入记录查询页面
pages: {
  ...
  "pages/record_crud/record_crud"
}在 app.json 里加入
"tabBar": {
  "borderStyle": "white",
  "selectedColor": "#15A1EA",
  "list": [
    {
    "pagePath": "pages/index/index",
    "text": "首页",
    "iconPath": "images/tabbar/tab1.png",
    "selectedIconPath": "images/tabbar/tab1-c.png"
    },
    {
    "pagePath": "pages/record_crud/record_crud",
    "text": "记录",
    "iconPath": "images/tabbar/tab2.png",
    "selectedIconPath": "images/tabbar/tab2-c.png"
    }
  ]
},集中管理接口调用函数
新建api目录并新建index.js文件
// api/index.js
const BASE_URL = "http://localhost:3000/api";
const app = getApp();

// 查询
export function get_records(sensor_name, create_time) {
  return new Promise((resolve, reject) => {
    wx.request({
      url: `${BASE_URL}/get_records`,
      data: {
        sensor_name,
        create_time: `${create_time}`,
      },
      success(response) {
        resolve(response);
      },
      fail(e) {
        reject(e);
      },
    });
  });
}

// 删除
export function del_record(id) {
  return new Promise((resolve, reject) => {
    wx.request({
      url: `${BASE_URL}/del_record`,
      method: "POST",
      data: {
        id,
      },
      success(response) {
        wx.showToast({ title: "删除成功", icon: "none" });
        resolve();
      },
      fail(e) {
        wx.showToast({ title: "删除失败", icon: "none" });
        reject(e);
      },
    });
  });
}

// 新增
export function add_record(sensor_name, sensor_value) {
  wx.request({
    url: `${BASE_URL}/add_record`,
    method: "POST",
    data: {
      sensor_name,
      sensor_value,
    },
    success(response) {},
    fail(e) {},
  });
}

// 修改
export function update_record(id, sensor_value) {
  return new Promise((resolve, reject) => {
    wx.request({
      url: `${BASE_URL}/update_record`,
      method: "POST",
      data: {
        id,
        sensor_value,
      },
      success(response) {
        resolve();
      },
      fail(e) {},
    });
  });
}更改数据记录逻辑
将之前编写的数据记录存入本地缓存的逻辑删除
将首页数据存入本地缓存方式改用存入数据库接口
import { add_record } from "../../api/index";

add_record("TEMPERATURE", Number(getMessageObj.TEMPERATURE));
add_record("HUMIDITY", Number(getMessageObj.HUMIDITY));
add_record("LIGHT_INTENSITY", Number(getMessageObj.LIGHT_INTENSITY));
add_record("SMOKE", Number(getMessageObj.SMOKE));抽离图表组件供多个页面复用
新建components目录并新建record_chart组件
record_chart.json里的usingComponents字段增加 "ec-canvas": "../../ec-canvas/ec-canvas”
"usingComponents": {
  "ec-canvas": "../../ec-canvas/ec-canvas"
}导入 echarts 和封装的调用接口函数
import * as echarts from "../../ec-canvas/echarts.min";
import { get_records } from "../../api/index";获取全局实例和定于中文字段和传感器的对应关系
const app = getApp();

const sensorMapObj = {
  温度: "TEMPERATURE",
  湿度: "HUMIDITY",
  光强: "LIGHT_INTENSITY",
  烟雾: "SMOKE",
};定义图表初始值和设置图表值函数
/* 设置chart方法 */
function setOption(chart) {
  let option = {
    grid: { containLabel: true },
    tooltip: { show: true, trigger: "axis" },
    xAxis: { type: "category", data: ["none"] },
    yAxis: { type: "value" },
    series: [{ data: [0], type: "line" }],
    dataZoom: [
      { type: "slider", start: 0, end: 100 },
      { type: "inside", start: 0, end: 100 },
    ],
  };
  chart.setOption(option);
}定义组件属性,用于在外面传入
properties: {
  sensorZhName: { type: String, value: "" }, // 传感器中文名字
  searchData: { type: String, value: "" }, //查询日期
  isNeedGetData: { type: Boolean, value: false }, // 是否需要接口获取数据
  chartData: { type: Array, value: () => [] } // 图表数据
  // myProperty2: String // 简化的定义方式
},定义组件 data 数据
ec: { lazyLoad: true }, // 将 lazyLoad 设为 true 后,需要手动初始化图表
isLoaded: false,
isDisposed: false,
chartDataInData: []定义组件生命周期函数,用于处理数据
lifetimes: {
  attached() {
    if (this.properties.isNeedGetData) {
      // console.log("从接口获取数据");
      get_records(sensorMapObj[this.properties.sensorZhName], this.properties.searchData).then(
        response => {
          this.setData({ chartDataInData: response.data.data });
        }
      );
    } else {
      this.setData({ chartDataInData: this.properties.chartData });
    }
  },
  ready() {
    // 获取组件节点
    this.ecComponent = this.selectComponent("#mychart-dom-bar");

    this.init();
    setTimeout(() => {
      console.log("图表数据", this.data.chartDataInData);
      this.data.chartDataInData.length &&
        this.chart?.setOption({
          xAxis: {
            type: "category",
            data: this.data.chartDataInData.map(item => item.create_time.slice(-5)),
          },
          series: [
            {
              data: this.data.chartDataInData.map(item => item.sensor_value),
              type: "line",
            },
          ],
        });
    }, 1000);
  },
},定义组件方法列表
// 点击按钮后初始化图表
init() {
  this.ecComponent.init((canvas, width, height, dpr) => {
    // 获取组件的 canvas、width、height 后的回调函数
    // 在这里初始化图表
    const chart = echarts.init(canvas, null, {
       width: width,
      height: height,
      devicePixelRatio: dpr, // new
     });
    setOption(chart);

    // 将图表实例绑定到 this 上,可以在其他成员函数(如 dispose)中访问
    this.chart = chart;

    this.setData({ isLoaded: true, isDisposed: false });

    // 注意这里一定要返回 chart 实例,否则会影响事件处理等
    return chart;
  });
},

dispose() {
  this.chart && this.chart.dispose();

  this.setData({ isDisposed: true });
},编写组件的页面结构
<ec-canvas
  wx:if="{{!isDisposed}}"
  id="mychart-dom-bar"
  canvas-id="mychart-bar"
ec="{{ ec }}"></ec-canvas>编写组件的样式
ec-canvas {
  width: 100%;
  height: 90%;
}至此我们的图表组件就定义完成了!可以在多个页面使用了
制作数据记录页面
拷贝首页的顶部图表和标题过来
抽离主页顶部样式为全局样式
编写头部下拉选择日期和传感器名盒子
编写数据列表展示的样式
引入图表组件并编写切换图表和列表展示按钮来切换
选择日期、传感器名、展示模式样式编写
<view class="select-box">
  <view class="title"
    >历史数据查询
    <van-icon style="margin-left: 40rpx" bind:tap="selectData" name="replay" />
  </view>

  <picker
    mode="date"
    value="{{timeValue}}"
    start="2024-01-01"
    end="2034-01-01"
    bindchange="bindDateChange">
    <view class="picker-box">
      <view> 查询日期: </view>
      <view class="picker-font-color">{{timeValue}}</view>
    </view>
  </picker>
  <picker bindchange="bindPickerChange" value="{{index}}" range="{{sensorNameList}}">
    <view class="picker-box">
      <view> 传感器名:</view>
      <view class="picker-font-color">{{sensorNameList[sensorNameIndex]}} </view>
    </view>
  </picker>
  <picker bindchange="bindrevealTypeChange" value="{{revealTypeIndex}}" range="{{revealList}}">
    <view class="picker-box">
      <view> 展示模式:</view>
      <view class="picker-font-color">{{revealList[revealTypeIndex]}} </view>
    </view>
  </picker>
</view>在 util.js 写入工具函数来获取当前年月日 YYYY-MM-DD
function getCurrYearMonthDate() {
  const currentDate = new Date();
  const year = currentDate.getFullYear();
  const month = (currentDate.getMonth() + 1).toString().padStart(2, "0");
  const day = currentDate.getDate().toString().padStart(2, "0");
  const formattedDate = `${year}-${month}-${day}`;
  //   console.log(formattedDate); // 输出当前日期,例如 "2024-01-14"
  return formattedDate;
}

// 并导出在记录页面导入获取时间函数和接口
import {getCurrYearMonthDate} from '../../utils/util’
import { get_records, del_record, update_record } from "../../api/index";
定义 data 的一些参数并赋予默认值
  revealList: ["列表", "图表"], // 数据展示模式
  revealTypeIndex: 0, // 连接方式的类型值 0列表 1图表
  showChart: false, // 控制图表显示隐藏

  timeValue: getCurrYearMonthDate(), //时间选择框的值

  sensorNameList: ["温度", "湿度", "光强", "烟雾"], //传感器下拉数据源
  sensorEnList: ["TEMPERATURE", "HUMIDITY", "LIGHT_INTENSITY", "SMOKE"], //传感器下拉数据源英文
  sensorNameIndex: "0", //传感器下拉值的index
  sensorNameEnValue: "TEMPERATURE",

  sensorMap: {
    TEMPERATURE: "°C",
    HUMIDITY: "%rh",
    LIGHT_INTENSITY: "lx",
    SMOKE: "ppm",
  }, //传感器单位

sersorInfoList: [], // 数据列表在页面首次进入函数里判断如果有值就查询数据
onLoad() {
  if (this.data.timeValue && this.data.sensorNameEnValue) this.selectData();
},定义选择器改变事件
// 日期改变事件
bindDateChange(e) {
  this.setData({ timeValue: e.detail.value });
  this.selectData();
},
// 传感器改变事件
bindPickerChange(e) {
  this.setData({
    sensorNameIndex: e.detail.value,
    sensorNameEnValue: this.data.sensorEnList[Number(e.detail.value)],
  });
  this.selectData();
},
// 切换展示模式
bindrevealTypeChange(e) {
  this.setData({ revealTypeIndex: Number(e.detail.value) });

  if (e.detail.value === '1') {
    this.setData({ showChart: true });
  }
},在页面的 json 文件里引入组件
"record_chart":"../../components/record_chart/record_chart”
在 app.json 引入
"van-cell": "@vant/weapp/cell/index", "van-cell-group": "@vant/weapp/cell-group/index"
编写页面增删改查方法
// 获取数据记录
selectData() {
  if (this.data.revealTypeIndex === 1) this.setData({ showChart: false });

  get_records(this.data.sensorNameEnValue, `${this.data.timeValue}`).then(
    (response) => {
      this.setData({ sersorInfoList: response.data.data });
      if (this.data.revealTypeIndex === 1) this.setData({ showChart: true });
    }
  );
},
// 删除记录
delRecord(e) {
  let that = this;
  wx.showModal({
    title: "系统提示",
    content: "是否确认删除本条消息",
    complete: (res) => {
      if (res.confirm) {
        del_record(e.currentTarget.dataset.id).then(() => {
          that.selectData();
        });
      }
    },
  });
},
// 修改记录
updateRecord(e) {
  wx.showModal({
    title: "修改记录",
    editable: true,
    placeholderText: "请输入需要修改的值",
    confirmText: "确认修改",
    complete: (res) => {
      if (res.confirm) {
        if (res.content && !isNaN(Number(res.content))) {
          // console.log(Number(res.content));

          update_record(e.currentTarget.dataset.id, Number(res.content)).then(
            () => {
              wx.showToast({ title: "修改成功", icon: "none" });
              this.selectData();
            }
          );
        } else {
          wx.showToast({ title: "输入有误", icon: "none" });
        }
      }
    },
  });
},编写页面展示列表和图表
<!-- 列表模式 -->
<view wx:if="{{revealTypeIndex===0}}" class="list-mode">
  <scroll-view scroll-y="true" style="height: calc(100vh - 620rpx)">
    <van-cell-group inset border="{{false}}">
      <van-cell
        wx:for="{{sersorInfoList}}"
        title="{{item.sensor_value + sensorMap[sensorNameEnValue]}}"
        wx:key="item"
        data-id="{{item.id}}"
        data-value="{{item.sersor_value}}"
        bind:longpress="delRecord"
        bind:tap="updateRecord"
        value="{{item.create_time}}" />
    </van-cell-group>
  </scroll-view>
</view>
<!-- 图表模式 -->
<view
  wx:if="{{revealTypeIndex === 1 && showChart}}"
  style="height: calc(100vh - 530rpx); margin: 0 2rpx 4rpx">
  <record_chart chart-data="{{sersorInfoList}}" />
</view>最后附上页面样式文件
.select-box {
  margin: 38rpx 32rpx 0;
  box-shadow: 0 8rpx 20rpx 0 rgba(0, 0, 0, 0.3);
  border-radius: 32rpx;
  padding: 20rpx;
  background-color: #ffffff;
}

.title {
  text-align: center;
  font-size: 44rpx;
  margin-bottom: 20rpx;
}

.picker-box {
  display: flex;
  margin-bottom: 10rpx;
}

.list-mode {
  background-color: #ffffff;
  margin: 38rpx 32rpx 0;
  box-shadow: 0 8rpx 20rpx 0 rgba(0, 0, 0, 0.3);
  border-radius: 32rpx;
}

.picker-font-color {
  color: #969799;
}改写之前的图表页面逻辑
将 chart 页面删除,新建 record 页面,改成调用我们写的图表组件
// record.js
import { getCurrYearMonthDate } from "../../utils/util";

const app = getApp();

Page({
  data: {
    showChart: false, // 控制图表显示隐藏
    sensorZhName: "", // 传感器英文名
    timeValue: getCurrYearMonthDate(), //时间选择框的值
  },
  onLoad({ data }) {
    // console.log(JSON.parse(data));
    let { name, parameter, unit } = JSON.parse(data) || {};
    wx.setNavigationBarTitle({ title: `${parameter}记录(单位${unit})` });
    this.setData({ sensorZhName: parameter, showChart: true });
  },
  bindDateChange(e) {
    this.setData({ showChart: false, timeValue: e.detail.value });
    setTimeout(() => {
      this.setData({ showChart: true });
    }, 500);
  },
});<!-- record.wxml -->
<view class="page-container">
<picker
mode="date"
value="{{timeValue}}"
start="2024-01-01"
end="2034-01-01"
bindchange="bindDateChange">
<view class="picker-box">
<view> 查询日期: </view>
<view class="picker-font-color">{{timeValue}}</view>
</view>
</picker>
<record_chart
is-need-get-data
sensor-zh-name="{{sensorZhName}}"
search-data="{{timeValue}}"
wx:if="{{showChart}}" />
</view>/* record.wxss */
.page-container {
width: 100vw;
height: 92vh;
}
.picker-box {
display: flex;
justify-content: space-between;
margin: 10rpx 72rpx;
}{
"usingComponents": {
"record_chart": "../../components/record_chart/record_chart"
},
"navigationBarTitleText": "记录",
"navigationStyle": "default"
}更改跳转 record 页面逻辑
  // wxml增加
  data-param="{{item}}"


  let data = e.currentTarget.dataset.item;
  wx.navigateTo({
      url: "/pages/record/record?data=" + JSON.stringify(data)
});至此小程序结合后端实现增删改查历史数据的功能已开发完毕!